In the past, people used candles only as a source of light at night. Some stood in delicate and delicate candlesticks, others were given a cup and saucer on the table. The requirements were simple – light and warmth.

Now, with the invention of electricity, we do not need its basic properties, but candles are still part of our homes. You can see both various aroma candles and simple tablet candles. The variety of types, aromas, shapes and colors will impress even the most demanding person. Today we will dive into this amazing world of candles and learn how to make them ourselves, and most importantly – easily and simply! If you are ready, then quickly prepare your nimble hands and a good mood, we will begin.
Our master class is dedicated to twisted candles from sheets of wax foundation. These are the easiest candles to make. It is easy and interesting to start with them, to try yourself in a new business and create something yourself. However, there are subtleties here, an incorrectly twisted candle can either burn weakly or burn out instantly. We will tell you about the subtleties of work for a good result. If you get hooked on this activity, I recommend trying to make candles from soy wax in the future.
Step #1. Preparing materials
We will need:
- a sheet of wax foundation (any size),
- cotton wick,
- a wish.
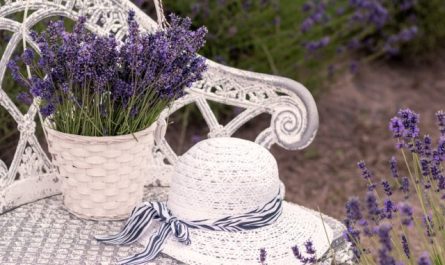
The remaining decorative elements are optional but recommended. In my case, these are dried lavender, thin twine, and a cassia stick. You can also use any other dried herbs, flowers, ribbons, glitter, aroma oils, gold leaf, etc. to decorate and scent the candle.

Important! All external decorative elements, such as ribbons, for example, must be removed while the candle is burning to avoid a strong fire.
How to choose a color for a candle and what herbs to use?
- Lavender – protection, calmness and relaxation, improving sleep. These candles are best suited for the bedroom.
- Wormwood – cleanses space, protects from the evil eye and negative influences.
- Sage – helps to achieve success, brings good luck in business.
- St. John’s wort – restores strength and maintains good spirits, fills with positive energy.
- Mint – attracts good luck and financial well-being.
- Rose is a flower of love and beauty, used to attract new relationships into life, or to revive passion in existing ones.
- Chamomile – peace and tranquility, restoration of strength after a difficult task or period in life.
- Jasmine – clears the mind and gives clarity of mind, candles with it are used for meditation.
The color of the wax sheet can also be selected based on your intentions for the candle.:
- Red – passion, love, energy, will.
- Orange – success, fame, creativity
- Yellow – joy, happiness, optimism.
- Green – money, victory, growth.
- Blue – creativity, success, self-realization.
- Blue – inspiration, communication, health.
- Purple – calmness, harmony, intelligence.
- Black – from negativity, after quarrels and illnesses.
- White – blessing, spirituality, peace.
So, when you have chosen and prepared everything you need, you can begin.
Step №2
Cut the wick a centimeter longer than the sheet of wax foundation. Do not make the edge of the wick too long, to avoid a strong flame. The indent from the edge of the sheet should also be about a centimeter

Step №3
Press the wick into the sheet. Wax is a flexible and thin material, for ease of work and beautiful twisting, carefully press the wick into the sheet with your fingers. If you have done everything correctly, then when you lift or turn the sheet over, the wick will remain in place and will not fall.

Step №4
Carefully bend the edge of the sheet and “cover” the wick with it. We start to spin our candle. Place your fingers as if on a rolling pin and make the first turns. Press the layers not too tightly against each other, but also so that there is no air left inside.

Step №5
Only after making 2-3 turns of the wax foundation around the wick can you add various herbs. Please note that dried herbs often contain sticks, stems and twigs – they must be removed manually. They will not give off much of a smell, and besides, they can catch fire independently of the candle, which is already dangerous.

After you have poured the necessary filling, continue to twist until the thickness that suits you, not forgetting to press the wax a little. Here, give free rein to your imagination and creativity.

I will show you two different options for decorating a candle, and you can make your own unique and inimitable option.
Step №6
The edge of the sheet should be pressed slightly to the candle, as if you were working with plasticine, and the edge should be smeared with your finger. This is how the candle should look when the edge is pressed to it.

Step №7
We have already sprinkled herbs inside for aromatic burning, now we will add a little on the outside for beauty. Wormwood is quite loose, so I work on a separate leaf and simply roll the candle as if it were a rolling pin. No need to press, just roll it for a minute or two.

Step №8
Everything is the same, twisted the second identical candle. Compare your candle with the one in the photo. This is how a correctly twisted candle should look from above, which will burn well.

I did not add lavender to the second candle, we will decorate it with gold leaf. Even such a small leaf will be enough for us. I apply it to the candle in small pieces and pat it down. Be careful, the gold leaf is very thin and tears easily, and it also sticks to the candle without much effort. When my candle acquires a pink mirror shine, I tie a cinnamon stick and a small sprig of dried flowers to it. Such a candle looks impressive and will be an unusual gift for any holiday.

Voila! Your candle is ready, you are gorgeous, it is gorgeous! Now let’s compare them with the store-bought ones, on the right one is lavender, and the other one is mint. I think that our candles look not only no worse, but even better, because they are made with our own hands and with soul.

Until next time, create amazing things with your own hands!